
Keyboard PCB Assembly: A Comprehensive Guide
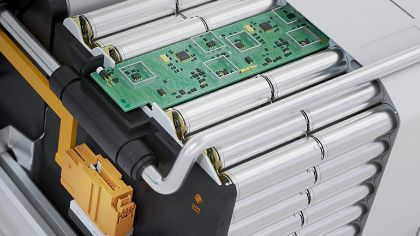
Keyboard PCB assembly is a crucial process in the manufacturing of modern computer keyboards. PCB, or printed circuit board, is an essential component of a keyboard that connects all the keys to the computer. A keyboard PCB consists of several layers of conductive material, insulating material, and vias that allow the electrical signals to pass through the board.

The PCB assembly process involves several steps, including designing the PCB, selecting the components, and soldering them onto the board. The design process involves creating a schematic of the keyboard layout and then translating it into a physical layout of the PCB. The components used in the assembly process include switches, diodes, resistors, capacitors, and LEDs. These components are carefully selected based on their specifications and compatibility with the PCB layout. Once the components are selected, they are soldered onto the PCB using automated or manual processes. The final product is a fully functional keyboard that can be connected to a computer.
Fundamentals of Keyboard PCB Assembly

Keyboard PCB assembly is a crucial process in the manufacturing of keyboards. It involves the assembly of various electronic components on the Printed Circuit Board (PCB) of the keyboard. This section will cover the basic fundamentals of keyboard PCB assembly.
PCB Design
Before the assembly process can begin, the PCB design must be finalized. The design includes the placement of electronic components, the routing of traces, and the overall layout of the PCB. The design must be optimized for the specific keyboard model and must take into account factors such as the size of the keyboard, the number of keys, and the type of switches used.
Component Placement
The next step in the assembly process is the placement of electronic components on the PCB. This includes switches, diodes, resistors, capacitors, and other components. The placement must be precise and accurate to ensure that the keyboard functions properly.
Soldering
Once the components are placed on the PCB, the next step is soldering. Soldering is the process of permanently joining the components to the PCB using solder. The soldering process must be done carefully to avoid damaging the components or the PCB.
Testing
After the soldering process is complete, the keyboard must be tested to ensure that it functions properly. This includes testing each key to ensure that it registers when pressed and released. Any issues must be addressed before the keyboard can be packaged and shipped.
In summary, keyboard PCB assembly is a complex process that requires careful planning, precise component placement, and accurate soldering. By following these fundamental steps, manufacturers can produce high-quality keyboards that meet the needs of their customers.
Components and Materials
When it comes to assembling a keyboard PCB, there are several components and materials to consider. These include the PCB itself, key switches, stabilizers, diodes and resistors, and controller chips.
PCB Materials
The PCB, or printed circuit board, is the foundation of the keyboard. It is the flat board that holds all the components together, and it is what the key switches are mounted on. PCBs can be made from a variety of materials, including fiberglass, plastic, and metal. Fiberglass PCBs are the most common choice for keyboard PCBs due to their durability and affordability.
Key Switches
Key switches are the individual switches that are mounted onto the PCB. They are responsible for registering keystrokes when a key is pressed. There are several types of key switches available, each with their own unique characteristics. Some popular key switch brands include Cherry MX, Gateron, and Kailh.
Stabilizers
Stabilizers are used to keep larger keys, such as the spacebar and shift keys, stable and level when pressed. They consist of a wire or plastic piece that connects the keycap to the PCB. Stabilizers can be either plate-mounted or PCB-mounted.
Diodes and Resistors
Diodes and resistors are used to regulate the flow of electricity through the keyboard. Diodes are used to prevent ghosting, which is when multiple keys are registered when only one key is pressed. Resistors are used to regulate the amount of current that flows through the circuit.
Controller Chips
Controller chips are the brains of the keyboard. They are responsible for interpreting keystrokes and sending the appropriate signals to the computer. There are several types of controller chips available, including the popular Atmel AVR series.
In summary, assembling a keyboard PCB requires careful consideration of several components and materials. By choosing the right PCB, key switches, stabilizers, diodes and resistors, and controller chips, one can create a high-quality keyboard that is both functional and durable.
Design and Layout
Circuit Design
The first step in designing a keyboard PCB is to determine the circuit design. This involves selecting the type of switches, the number of keys, and the layout of the keys. The circuit design must be carefully planned to ensure that all keys are properly connected to the controller and that there are no electrical issues.
Layout Considerations
The layout of a keyboard PCB is an important consideration. It is important to ensure that the layout is ergonomic and easy to use. The layout should also be optimized for the specific application. For example, a gaming keyboard may have a different layout than a keyboard for typing.
Mounting Styles
There are several mounting styles to choose from when designing a keyboard PCB. The most common are through-hole and surface-mount. Through-hole mounting involves inserting components through holes in the PCB and soldering them in place. Surface-mount mounting involves soldering components directly to the surface of the PCB.
When designing a keyboard PCB, it is important to consider the mounting style that will be used. Through-hole mounting is generally easier for beginners, but surface-mount mounting is more compact and allows for more components to be placed on the PCB.
Overall, the design and layout of a keyboard PCB is an important consideration. By carefully planning the circuit design, layout, and mounting style, it is possible to create a reliable and ergonomic keyboard that meets the needs of the user.
Assembly Process
The assembly process for keyboard PCBs involves several steps to ensure a high-quality and functional end product. The process typically involves soldering techniques, quality control, and testing procedures.
Soldering Techniques
Soldering is a critical step in the assembly process of keyboard PCBs. The soldering technique used can greatly impact the functionality and durability of the keyboard. The most common soldering techniques used for keyboard PCBs include:
- Hand Soldering: This technique involves manually placing and soldering each component onto the PCB. It requires a high level of skill and precision to ensure proper alignment and soldering of each component.
- Reflow Soldering: This technique involves applying solder paste to the PCB and then heating the entire board to melt the solder and create a connection between the components and the PCB.
- Wave Soldering: This technique involves passing the PCB over a wave of molten solder to create a connection between the components and the PCB.
Quality Control
Quality control is an essential part of the assembly process for keyboard PCBs. It involves inspecting each component and the PCB to ensure they meet the required specifications and standards. The quality control process typically includes:
- Visual Inspection: This involves inspecting the components and the PCB visually to ensure they are free from defects, damage, or misalignment.
- Functional Testing: This involves testing the keyboard PCB to ensure it functions as intended. This includes testing each key, LED, and other features to ensure they work correctly.
Testing Procedures
Testing procedures are an essential part of the assembly process for keyboard PCBs. They help ensure the functionality and durability of the keyboard. The testing procedures typically include:
- Electrical Testing: This involves testing the electrical connections between the components and the PCB to ensure they are functioning correctly.
- Durability Testing: This involves testing the keyboard PCB to ensure it can withstand repeated use and abuse without failure.
Overall, the assembly process for keyboard PCBs is a complex and intricate process that requires a high level of skill and precision. The use of proper soldering techniques, quality control, and testing procedures is essential to ensure a high-quality and functional end product.
Advanced Techniques
Surface Mount Technology
Surface mount technology (SMT) is a method of assembling electronic circuits where the components are mounted directly onto the surface of a printed circuit board (PCB). This technique allows for smaller and more compact designs, as well as easier automated assembly.
To successfully assemble a PCB using SMT, it’s important to have the right tools and equipment. A soldering iron with a fine tip, a magnifying glass, and tweezers are essential. Additionally, a solder paste stencil can help ensure accurate placement of the components.
The solder paste is applied to the PCB using the stencil, and then the components are placed onto the paste. The board is then heated in a reflow oven, causing the paste to melt and the components to bond to the board.
Through-Hole Technology
Through-hole technology (THT) is a method of assembling electronic circuits where the components are inserted through holes in the PCB and then soldered onto the other side. This technique is often used for larger components or those that require a stronger mechanical connection.
To assemble a PCB using THT, a soldering iron with a larger tip is typically used. The component leads are inserted through the holes and then bent to hold them in place. The solder is then applied to the joint, creating a strong mechanical and electrical connection.
While THT is generally considered to be a simpler and more forgiving technique than SMT, it does have its drawbacks. THT components are typically larger and take up more space on the board, which can limit design options. Additionally, manual assembly can be time-consuming and prone to errors.
Overall, both SMT and THT have their advantages and disadvantages, and the choice of which technique to use will depend on the specific requirements of the project. By understanding the differences between the two techniques and having the right tools and equipment, it’s possible to successfully assemble a high-quality PCB.
Troubleshooting and Maintenance
When assembling a keyboard PCB, it is important to keep in mind that things may not always go as planned. In the event that something goes wrong, it is important to know how to troubleshoot the issue.
One common issue that may arise is a non-functional key. This could be due to a number of reasons, including a faulty switch or a damaged trace on the PCB. To troubleshoot this issue, it is recommended to check the switch first by testing it with a multimeter. If the switch is functioning properly, then it may be necessary to check the trace on the PCB to see if there is any damage.
Another issue that may arise is a short circuit. This can occur when two or more traces on the PCB come into contact with each other. To troubleshoot this issue, it is recommended to use a multimeter to check for continuity between the traces. If a short circuit is found, it may be necessary to use a soldering iron to separate the traces and prevent further issues.
Regular maintenance can also help prevent issues from occurring in the first place. It is recommended to clean the PCB regularly using a soft-bristled brush and isopropyl alcohol. This can help remove any dust or debris that may accumulate on the PCB and prevent it from functioning properly.
In addition, it is important to regularly inspect the PCB for any signs of damage, such as cracked traces or damaged components. If any issues are found, it is recommended to address them as soon as possible to prevent further damage to the PCB.