PCB Assembly Notes: Tips for a Successful Build
PCB assembly notes are an essential part of the manufacturing process for printed circuit boards. These notes provide detailed instructions and guidelines for assembling the components onto the PCB. They are typically created by the designer or engineer responsible for the project and are used by the manufacturer to ensure that each board is assembled correctly.

PCB assembly notes can include information on component placement, soldering techniques, and testing procedures. They may also include notes on specific components or features that require special attention during assembly. These notes are critical to ensuring that the finished product meets the desired specifications and performs as intended.
Manufacturers may also use PCB assembly notes to improve their processes and increase efficiency. By analyzing the notes and identifying areas for improvement, manufacturers can refine their processes and reduce the risk of errors or defects. Overall, PCB assembly notes are an essential tool for ensuring the quality and reliability of printed circuit boards.
PCB Assembly Overview

PCB assembly is a crucial step in the process of manufacturing electronic devices. It involves the installation of electronic components onto a printed circuit board (PCB) using various soldering techniques. The final product must meet strict quality assurance standards to ensure it functions properly.
Components Identification
Before beginning the assembly process, it’s important to properly identify all the components needed for the PCB. This includes resistors, capacitors, diodes, transistors, and more. Each component has its own unique specifications that must be taken into account during the assembly process.
To aid in component identification, manufacturers often use a bill of materials (BOM) that lists all the necessary components and their specifications. This helps to ensure that the correct components are used and that the final product meets the required specifications.
Soldering Techniques
There are several soldering techniques used in PCB assembly, including surface mount technology (SMT) and through-hole technology (THT). SMT involves attaching components to the surface of the PCB using solder paste and a reflow oven. THT involves inserting components through holes in the PCB and soldering them in place.
Both techniques have their advantages and disadvantages, and the choice of technique depends on the specific application and design requirements. It’s important to use proper soldering techniques to ensure that the components are securely attached to the PCB and that there are no solder bridges or other defects.
Quality Assurance
Quality assurance is an essential part of the PCB assembly process. It involves checking the finished product for defects and ensuring that it meets the required specifications. This can include visual inspections, electrical testing, and functional testing.
Manufacturers often use automated testing equipment to ensure that the PCBs meet the required standards. This helps to reduce the risk of defects and ensures that the final product is reliable and performs as expected.
In conclusion, PCB assembly is a complex process that requires careful attention to detail and adherence to strict quality assurance standards. By properly identifying components, using appropriate soldering techniques, and conducting thorough testing, manufacturers can ensure that their products are reliable and meet the required specifications.
Design for Manufacturability
Design for Manufacturability (DFM) is the process of designing a printed circuit board (PCB) with the goal of making it easy and cost-effective to manufacture. A well-designed PCB can significantly reduce the time and cost of the assembly process. Here are some key factors to consider when designing a PCB for manufacturability.
Layout Considerations
The layout of a PCB plays a crucial role in its manufacturability. A good layout should be easy to assemble and test, and should minimize the risk of errors or defects. Here are some layout considerations to keep in mind:
- Component Placement: Components should be placed in a logical and organized manner, with sufficient space between them for assembly and testing. Components should also be placed in a way that minimizes the length of the traces between them, which can help reduce noise and signal interference.
- Trace Width and Spacing: The width and spacing of traces should be carefully selected to ensure that they can be easily manufactured and tested. Narrow traces can be difficult to manufacture, while wide traces can take up too much space on the board.
- Via Placement: Vias should be placed in a way that minimizes their impact on the layout and routing of the board. Vias should also be placed in a way that minimizes the risk of errors or defects during assembly.
Material Selection
The choice of materials used in the PCB can also have a significant impact on its manufacturability. Here are some material considerations to keep in mind:
- Substrate Material: The substrate material used in the PCB should be selected based on its performance characteristics, as well as its cost and availability. Common substrate materials include FR-4, polyimide, and ceramic.
- Copper Foil Thickness: The thickness of the copper foil used in the PCB can affect its manufacturability. Thicker copper foil can be more difficult to etch and drill, while thinner copper foil can be more prone to damage during handling and assembly.
- Solder Mask: The solder mask is a protective layer that is applied to the PCB to prevent solder from flowing onto unwanted areas. The choice of solder mask material can affect the manufacturability of the board, as well as its performance characteristics.
By taking these factors into consideration during the design process, it is possible to create a PCB that is easy and cost-effective to manufacture.
Assembly Process
Stencil Printing
The first step in the PCB assembly process is stencil printing. Stencil printing involves applying solder paste to the PCB through a stencil. This is done using a machine called a stencil printer. The solder paste is applied to the pads where the components will be placed. The stencil printer ensures that the solder paste is applied precisely and accurately.
Pick and Place
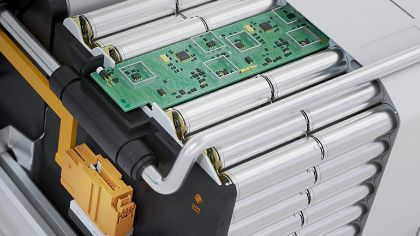
The next step in the PCB assembly process is pick and place. This involves placing the components on the PCB. This is done using a machine called a pick and place machine. The pick and place machine picks up the components from a reel or tray and places them on the PCB. The pick and place machine ensures that the components are placed precisely and accurately.
Reflow Soldering
After the components have been placed on the PCB, the next step is reflow soldering. Reflow soldering involves heating the PCB to a temperature that melts the solder paste and bonds the components to the PCB. This is done using a machine called a reflow oven. The reflow oven heats the PCB to the correct temperature and ensures that the components are soldered correctly.
Manual Assembly
In some cases, manual assembly may be required. This is when components cannot be placed using a pick and place machine. Manual assembly involves placing components on the PCB by hand. This is a time-consuming process and requires a high level of skill. Manual assembly is usually only used for small production runs or for prototypes.
Overall, the PCB assembly process involves several steps that must be done precisely and accurately. Each step is important to ensure that the final product is of high quality. By using the correct machines and processes, PCB assembly can be done efficiently and with a high degree of accuracy.
Inspection and Testing
Automated Optical Inspection
Automated Optical Inspection (AOI) is a crucial step in the PCB assembly process. AOI machines use high-resolution cameras to scan the surface of the PCB and detect any defects or errors in the assembly. AOI machines can detect issues such as missing components, incorrect component placement, and soldering defects. The use of AOI machines can greatly reduce the risk of faulty PCBs being shipped to customers.
Functional Testing
Functional testing is another important step in the PCB assembly process. This step involves testing the functionality of the PCB by applying power and simulating real-world usage scenarios. Functional testing can detect issues such as power supply problems, signal integrity issues, and software bugs. This step is critical in ensuring that the PCB meets the required specifications and functions as intended.
Overall, inspection and testing are critical steps in the PCB assembly process. By using automated inspection techniques and rigorous functional testing, manufacturers can ensure that their PCBs meet the required quality standards and function as intended.