
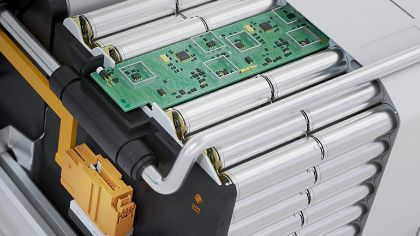
PCB Hand Assembly: The Pros and Cons
PCB hand assembly is a process in which electronic components are manually placed onto a printed circuit board (PCB) and then soldered in place. This method of assembly is often used for low-volume production runs or for prototyping. While it may be more time-consuming and labor-intensive than automated assembly methods, it can offer greater flexibility and precision.

One of the main advantages of PCB hand assembly is the ability to make adjustments and modifications during the assembly process. This can be particularly useful during the prototyping phase, when changes are often necessary to refine the design. By assembling the board by hand, engineers and technicians can make adjustments on the fly and ensure that the final product meets the necessary specifications.
Another benefit of hand assembly is the ability to achieve greater precision and accuracy. While automated assembly methods can be very precise, they may not be able to achieve the same level of accuracy as a skilled technician working with a microscope and specialized tools. This can be particularly important for small or delicate components, where even a small error can have a significant impact on the performance of the final product.
Basics of PCB Hand Assembly

PCB hand assembly is the process of manually placing and soldering electronic components onto a printed circuit board (PCB). This process is often used for small-scale production runs or for prototyping purposes.
The first step in PCB hand assembly is to gather all necessary tools and materials. This includes the PCB itself, electronic components, solder, a soldering iron, and any necessary cleaning materials.
Before beginning assembly, it is important to carefully inspect the PCB and components for any defects or damage. Any issues should be addressed before proceeding with assembly.
Next, the components are placed onto the PCB in their designated locations. This can be done using a variety of techniques, including tweezers or a vacuum pick-and-place tool.
Once all components are in place, the soldering process can begin. This involves heating the solder and applying it to the joint between the component and the PCB. The solder is then allowed to cool and solidify, creating a strong and permanent connection.
Throughout the assembly process, it is important to maintain a clean and organized workspace. This helps to prevent damage to components and ensures a high-quality finished product.
Overall, PCB hand assembly can be a time-consuming process, but it allows for a high degree of control over the final product. With proper tools, materials, and techniques, anyone can successfully assemble a PCB by hand.
Tools and Equipment for Hand Assembly

Soldering Irons
Soldering irons are essential tools for hand assembling PCBs. They are used to heat the solder and melt it onto the PCB pads and components. A good soldering iron should have adjustable temperature control, a comfortable grip, and a replaceable tip. The tip should be selected based on the size of the components being soldered. For example, a fine tip is needed for small surface mount components, while a larger tip is needed for larger through-hole components.
Solder and Flux
Solder and flux are used to create a strong and reliable electrical connection between the PCB pads and components. Solder is a metal alloy that melts at a relatively low temperature and solidifies quickly. Flux is a chemical compound that helps the solder to flow and bond to the metal surfaces. There are different types of solder and flux available, and the selection depends on the PCB materials and the type of components being used.
Tweezers and Pliers
Tweezers and pliers are used to hold and manipulate small components during the assembly process. They come in different shapes and sizes, and the selection depends on the type of components being used. For example, fine-tipped tweezers are needed for small surface mount components, while needle-nose pliers are needed for bending and shaping wire leads.
Inspection Magnifiers
Inspection magnifiers are used to visually inspect the PCB and components for defects and errors. They come in different magnification levels and styles, such as handheld or desktop. A good inspection magnifier should provide clear and sharp images, and should be comfortable to use for extended periods of time.
Overall, having the right tools and equipment is crucial for successful hand assembly of PCBs. By selecting the appropriate tools and using them correctly, the assembler can ensure a reliable and high-quality end product.
Component Placement Techniques
When it comes to hand assembling PCBs, proper component placement is crucial to ensure a functional and reliable circuit. There are two main types of components used in PCB assembly: surface mount components and through-hole components.
Surface Mount Components
Surface mount components (SMCs) are small components that are mounted directly onto the surface of the PCB. These components are typically smaller and more compact than through-hole components, which allows for higher density and more complex circuits.
To properly place SMCs, it is important to use a steady hand and the appropriate tools. Tweezers are commonly used to pick up and place SMCs onto the PCB. Additionally, a magnifying glass or microscope can be used to ensure proper alignment and placement of the components.
Through-Hole Components
Through-hole components (THCs) are larger components that are mounted through holes in the PCB. These components are typically used for high-power or high-voltage applications, as they can handle more current than SMCs.
To properly place THCs, it is important to ensure that the leads are properly aligned with the holes in the PCB. A soldering iron is used to heat the leads and the pad on the opposite side of the PCB, allowing the solder to flow and create a strong bond between the component and the board.
Overall, proper component placement is essential for a functional and reliable circuit. By following these techniques and using the appropriate tools, hand assembling PCBs can be a successful and rewarding process.
Soldering Process
Soldering is a crucial step in the PCB hand assembly process. It involves joining two metal surfaces with a filler metal, called solder. In this section, we will discuss the three main steps of the soldering process: tinning the tip, soldering surface mount devices, and soldering through-hole components.
Tinning the Tip
Before soldering, it is essential to tin the tip of the soldering iron. This process involves coating the tip with a thin layer of solder. Tinning helps to transfer heat efficiently from the soldering iron to the joint being soldered. It also helps to prevent oxidation of the tip.
To tin the tip, first, clean the tip with a damp sponge or cloth. Then, apply a small amount of solder to the tip. The solder should melt and coat the entire tip evenly. Wipe off any excess solder with a damp sponge or cloth.
Soldering Surface Mount Devices
Surface mount devices (SMDs) are components that are soldered directly onto the surface of the PCB. SMDs are smaller and more compact than through-hole components, making them ideal for use in small electronic devices.
To solder SMDs, first, apply a small amount of solder to one pad. Then, use tweezers to position the component onto the pad. Heat the pad and component with the soldering iron until the solder melts and flows around the pad and component. Finally, solder the remaining pads.
Soldering Through-Hole Components
Through-hole components are larger components that have leads that pass through holes in the PCB. They are typically used for components that require higher power ratings or for components that need to be easily replaceable.
To solder through-hole components, first, insert the component leads into the holes on the PCB. Then, bend the leads slightly outward to hold the component in place. Apply heat to the lead and pad with the soldering iron until the solder melts and flows around the lead and pad. Finally, trim the excess lead with wire cutters.
In conclusion, soldering is a critical step in the PCB hand assembly process. By following the proper techniques, one can ensure a reliable and sturdy connection between the components and the PCB.
Inspection and Quality Control
Visual Inspection
After the completion of the PCB hand assembly process, the next step is to perform visual inspection to ensure that the board is free from any defects. The inspection process involves checking for any physical damage, such as scratches, cracks, or broken components, and verifying that all components are correctly placed and soldered.
To conduct the visual inspection, the inspector uses a magnifying glass or microscope to examine the board. The inspector checks for any solder bridges, cold solder joints, or any other defects that may affect the functionality of the board. Any defects found during the inspection are documented and corrected before moving on to the next step.
Functional Testing
Once the visual inspection is complete and any defects are corrected, the PCB undergoes functional testing. This testing is performed to ensure that the board operates correctly and meets the required specifications.
Functional testing involves applying power to the board and performing various tests to ensure that all components are working correctly. The testing process may involve using specialized equipment to test the board’s functionality or manually performing tests on the board.
During functional testing, the board is checked for any errors or malfunctions that may occur during operation. Any issues found during the testing process are documented and corrected before the board is approved for use.
Overall, the inspection and quality control process is critical to ensuring that the PCB hand assembly process produces high-quality boards that meet the required specifications. Through visual inspection and functional testing, defects can be identified and corrected, ensuring that the board operates correctly and meets the customer’s expectations.