
Stencil PCB Assembly: A Guide to the Process
Stencil PCB assembly is a process used in the manufacturing of printed circuit boards (PCBs). It involves the use of a stencil to apply solder paste onto the board, which is then populated with surface-mount components. This method has become increasingly popular due to its precision and efficiency.

The stencil is a thin metal sheet with cutouts that correspond to the locations of the surface-mount components on the PCB. The solder paste is applied to the board through these cutouts using a squeegee or a stencil printer. Once the paste is applied, the components are placed onto the board using pick-and-place machines. The board is then heated to melt the solder paste, which creates a permanent connection between the components and the board.
Stencil PCB assembly offers several advantages over traditional methods of PCB assembly. It allows for a higher degree of accuracy and consistency, as the solder paste is applied only where it is needed. This reduces the risk of errors and defects, and ensures that the board functions properly. Additionally, stencil PCB assembly is faster and more efficient than other methods, as it eliminates the need for manual soldering and reduces the time required for rework.
Basics of Stencil PCB Assembly

Stencil Fabrication
Stencil fabrication is the process of creating a stencil that is used to apply solder paste to the printed circuit board (PCB). The stencil is typically made of stainless steel, and is created using a process called chemical etching. During this process, a stencil design is transferred onto a sheet of stainless steel, and then a chemical solution is used to etch away the areas of the steel that are not part of the design. This leaves behind a stencil with the desired pattern.
The quality of the stencil is important for achieving good solder paste application. The thickness of the stencil, the size and shape of the apertures, and the smoothness of the edges all play a role in determining the quality of the solder paste application.
Solder Paste Application
Once the stencil has been fabricated, it is used to apply solder paste to the PCB. Solder paste is a mixture of tiny balls of solder and flux, and it is applied to the PCB using the stencil and a squeegee. The stencil is placed over the PCB, and the solder paste is spread over the stencil using the squeegee. The solder paste is then forced through the apertures in the stencil and onto the PCB, where it forms a bond between the components and the PCB.
The amount of solder paste applied is critical for achieving good solder joints. Too little paste will result in weak joints, while too much paste can cause bridging between the components. The thickness of the stencil, the size and shape of the apertures, and the pressure applied during the application process all play a role in determining the amount of solder paste applied.
In summary, stencil PCB assembly is a critical process in the manufacture of electronic devices. The quality of the stencil and the amount of solder paste applied are both important factors in achieving good solder joints. By understanding the basics of stencil fabrication and solder paste application, manufacturers can improve the quality and reliability of their products.
Stencil Design Considerations
Stencil design is a critical aspect of the PCB assembly process. The stencil is used to apply solder paste to the PCB, which is then used to attach surface mount components. There are several factors to consider when designing a stencil, including aperture geometry and stencil thickness.
Aperture Geometry
The aperture geometry refers to the shape and size of the openings in the stencil. The size and shape of the aperture will determine the amount of solder paste that is applied to the PCB. The aperture size should be slightly larger than the pad size to ensure that enough solder paste is applied. The shape of the aperture should match the shape of the pad to ensure that the solder paste is applied evenly.
It is important to consider the aspect ratio of the aperture. The aspect ratio is the ratio of the height of the aperture to the width of the aperture. A high aspect ratio can lead to problems with the release of the solder paste, while a low aspect ratio can lead to problems with the placement of the component.
Stencil Thickness
The stencil thickness is another important consideration when designing a stencil. The thickness of the stencil will determine the amount of solder paste that is applied to the PCB. A thicker stencil will apply more solder paste, while a thinner stencil will apply less solder paste.
It is important to consider the thickness of the stencil in relation to the size of the aperture. A thicker stencil will require a larger aperture to ensure that enough solder paste is applied. A thinner stencil will require a smaller aperture to ensure that the solder paste is applied evenly.
In conclusion, stencil design is a critical aspect of the PCB assembly process. Aperture geometry and stencil thickness are two important factors to consider when designing a stencil. By considering these factors, designers can ensure that the right amount of solder paste is applied to the PCB, leading to successful PCB assembly.
Assembly Process
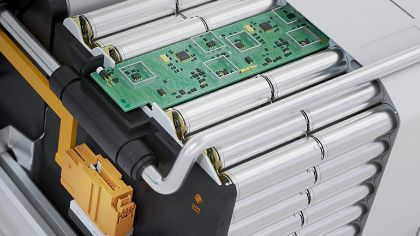
Stencil PCB assembly is a popular method for assembling printed circuit boards due to its speed, efficiency, and accuracy. The assembly process involves two main steps: component placement and reflow soldering.
Component Placement
During the component placement stage, the operator aligns the components with the corresponding pads on the PCB. This process is usually done with the help of a pick and place machine, which uses a vacuum to pick up and place the components on the PCB.
The operator must carefully inspect the placement of each component to ensure that it is aligned correctly and that there are no shorts or misalignments. This is an important step in the assembly process, as any errors at this stage can cause significant problems later on.
Reflow Soldering
Once the components are in place, the PCB is ready for reflow soldering. This process involves heating the PCB to a temperature that melts the solder and fuses the components to the PCB.
Reflow soldering is usually done in a reflow oven, which heats the PCB to a precise temperature for a set amount of time. The oven has several heating zones, each with a different temperature profile, to ensure that the PCB is heated evenly and that the solder melts uniformly.
After the solder has melted, the PCB is cooled to solidify the solder joints. The finished board is then inspected for any defects, such as shorts or cold joints, before being shipped to the customer.
Overall, the stencil PCB assembly process is a fast and efficient way to assemble printed circuit boards. By using automated equipment and precise temperature control, stencil PCB assembly can produce high-quality boards with minimal errors.
Quality Control and Testing
Automated Optical Inspection
Once the stencil PCB assembly process is complete, the PCB undergoes automated optical inspection (AOI) to ensure that all components are correctly placed, aligned, and soldered. AOI uses advanced software and high-resolution cameras to detect any defects or errors in the PCB. The AOI system compares the actual PCB with the digital design files to identify any discrepancies.
The AOI system can detect errors such as missing components, incorrect polarity, and soldering defects. The system generates a report that highlights any errors detected during the inspection process. This report is used to correct any errors and improve the quality of the PCB.
Functional Testing
After the AOI process is complete, the PCB undergoes functional testing to ensure that it meets the required specifications. The functional testing process involves applying power to the PCB and testing each component’s functionality.
The functional testing process checks the PCB’s power consumption, voltage levels, and signal quality. The PCB is tested under various operating conditions to ensure that it meets the required specifications.
Any errors or defects detected during the functional testing process are corrected, and the PCB is retested until it meets the required specifications.
In conclusion, quality control and testing are crucial steps in stencil PCB assembly. These processes ensure that the PCB meets the required specifications and is free from defects. The use of AOI and functional testing helps to improve the quality of the PCB and reduce the risk of failures.