
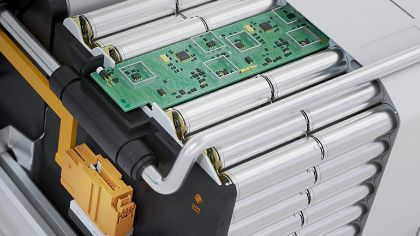
Home Based PCB Assembly: Tips and Tricks for Successful DIY Projects
Home-based PCB assembly is a popular trend among electronics enthusiasts, hobbyists, and small business owners. With the rise of affordable and accessible electronics manufacturing tools, it has become easier than ever to design and assemble printed circuit boards (PCBs) from the comfort of one’s own home. Home-based PCB assembly offers several advantages, including cost savings, flexibility, and customization options.

One of the main benefits of home-based PCB assembly is cost savings. By eliminating the need for outsourcing or hiring a professional assembly service, individuals can save a significant amount of money on production costs. Additionally, home-based assembly allows for greater control over the production process, which can help reduce waste and improve efficiency. This is particularly beneficial for small business owners who are looking to minimize expenses and maximize profits.
Another advantage of home-based PCB assembly is flexibility. Individuals can work on their projects at their own pace and on their own schedule, without being constrained by the limitations of a third-party assembly service. This allows for greater experimentation and iteration, as well as the ability to quickly make changes or adjustments as needed. Overall, home-based PCB assembly offers a convenient and cost-effective way for individuals to design and produce their own electronic devices.
Essentials of Home-Based PCB Assembly

Setting Up a Workspace
To begin with, it is essential to set up a dedicated workspace for PCB assembly. This workspace should be clean, well-lit, and free from any distractions. A desk or workbench is ideal, and it should be large enough to accommodate all the necessary tools and equipment.
It is also important to ensure that the workspace has adequate ventilation. Soldering produces fumes that can be harmful when inhaled, so it is recommended to work in a well-ventilated area or use a fume extractor.
Tools and Equipment
The right tools and equipment are crucial for successful home-based PCB assembly. Some of the essential tools include:
- Soldering iron: A good quality soldering iron is necessary for precise soldering. It is recommended to use a temperature-controlled soldering iron with interchangeable tips.
- Solder: High-quality solder is essential for reliable connections. Lead-free solder is recommended for environmental reasons.
- Desoldering tool: A desoldering tool is used to remove components and clean up solder joints.
- Multimeter: A multimeter is used to measure voltage, current, and resistance.
- PCB holder: A PCB holder is used to hold the PCB in place while soldering.
- Wire cutters and strippers: These tools are used to cut and strip wires.
It is also recommended to have a good quality magnifying glass or microscope to inspect the PCB and components.
In conclusion, setting up a dedicated workspace and having the right tools and equipment are essential for successful home-based PCB assembly. With the right setup, anyone can assemble PCBs at home with confidence and reliability.
PCB Design for Home Assembly
Design Software
One of the first considerations when designing a PCB for home assembly is the software that will be used. There are a variety of options available, ranging from free, open-source software to professional-grade programs. Some popular choices include Eagle PCB Design, KiCad, and Altium Designer. It is important to choose a software that is user-friendly and has a wide range of features to accommodate the specific needs of the project.
PCB Layout Considerations
When designing a PCB for home assembly, there are several layout considerations to keep in mind. First, the size of the board should be appropriate for the components that will be used. It is also important to consider the placement of components to ensure that they do not interfere with each other and that they are easily accessible for soldering.
Another important consideration is the trace width and spacing. These should be optimized to ensure that the board operates at the desired frequency and that there is no interference between traces. It is also important to consider the number of layers required for the board, as this will impact the complexity of the design and the cost of production.
Overall, designing a PCB for home assembly requires careful consideration of software, layout, and component placement. With the right tools and knowledge, it is possible to create a high-quality PCB that meets the needs of the project.
Sourcing Components
Identifying Suppliers
When it comes to sourcing components for home-based PCB assembly, it is important to identify reliable suppliers who can provide the necessary components at a reasonable price. One way to find suppliers is to search online directories such as Alibaba, Digi-Key, or Mouser. These directories have a wide range of suppliers who can provide components in bulk or small quantities.
Another way to identify suppliers is to attend trade shows or conferences related to electronics and PCB assembly. These events provide an opportunity to meet suppliers in person and discuss their products and services.
Quality and Authenticity
When sourcing components, it is important to ensure that they are of good quality and authentic. One way to do this is to request samples from the supplier before placing a large order. This allows the assembler to test the components and ensure that they meet the required specifications.
Another way to ensure quality and authenticity is to only purchase components from reputable suppliers. These suppliers have a track record of providing high-quality components and have established relationships with manufacturers.
It is also important to check the authenticity of the components, especially if they are being purchased from a third-party supplier. Counterfeit components can cause serious problems in the assembly process and can lead to the failure of the final product. As such, it is important to check the authenticity of the components by verifying their part numbers, logos, and packaging.
By identifying reliable suppliers and ensuring the quality and authenticity of the components, home-based PCB assemblers can produce high-quality products that meet the required specifications.
Assembly Techniques
Soldering Methods
Soldering is a common method used to join electronic components to a printed circuit board (PCB). There are two primary types of soldering methods: through-hole and surface-mount.
Through-hole soldering involves inserting component leads through holes in the PCB and soldering them on the other side. This method is commonly used for larger components that require more mechanical stability.
Surface-mount soldering involves attaching components to the surface of the PCB using small solder pads. This method is used for smaller components and allows for a higher component density on the board.
Surface-Mount Technology
Surface-mount technology (SMT) is a method of PCB assembly that involves attaching components to the surface of the PCB using small solder pads. SMT components are typically smaller and more compact than through-hole components, allowing for a higher component density on the board.
SMT components are attached to the PCB using a reflow soldering process. This involves applying solder paste to the PCB, placing the components on the paste, and then heating the entire assembly to melt the solder and create a strong bond between the component and the PCB.
Through-Hole Technology
Through-hole technology (THT) is a method of PCB assembly that involves inserting component leads through holes in the PCB and soldering them on the other side. THT components are typically larger and require more mechanical stability than SMT components.
THT components are attached to the PCB using a wave soldering process. This involves passing the PCB over a wave of molten solder, which flows through the holes and creates a strong bond between the component and the PCB.
In summary, there are two primary soldering methods used in home-based PCB assembly: through-hole and surface-mount. Surface-mount technology is used for smaller components and allows for a higher component density on the board, while through-hole technology is used for larger components that require more mechanical stability.
Quality Control and Testing
Inspection Methods
Before assembling printed circuit boards (PCBs) at home, it is important to ensure that the components are of good quality and free from defects. One way to do this is by performing a visual inspection of the components before soldering them onto the PCB. This can be done using a magnifying glass or a microscope to look for any physical damage or imperfections on the components.
Another inspection method is to use a multimeter to test the electrical properties of the components. This can help identify any faulty components that may cause issues in the final product. It is important to test the components before and after soldering them onto the PCB to ensure that they are still functioning properly.
Functional Testing
After assembling the PCB, it is important to perform functional testing to ensure that the circuit is working as intended. This can be done by connecting the assembled PCB to a power source and testing the output using a multimeter or an oscilloscope. The output should match the expected values based on the circuit design.
It is also important to test the PCB under different conditions, such as varying input voltages or temperatures, to ensure that it can handle different operating environments. This can be done by using a thermal chamber or by manually adjusting the input voltage.
By performing thorough quality control and testing, home-based PCB assembly can result in high-quality products that meet the desired specifications.
Troubleshooting and Repair
When assembling PCBs at home, it is common to encounter issues that require troubleshooting and repair. Here are some tips to help you diagnose and fix common problems:
- Check for shorts and open circuits: Use a multimeter to check for shorts and open circuits on the board. Shorts occur when two or more traces are connected that should not be, while open circuits occur when a trace is not connected where it should be. Look for solder bridges, misplaced components, and damaged traces.
- Inspect components: Look for damaged or misplaced components, and make sure they are inserted in the correct orientation. Check for bent pins on ICs and other components, and ensure that all components are securely seated in their sockets.
- Check power supply: If the board is not working at all, check the power supply. Make sure that the voltage is correct and that the polarity is correct. Check the power supply circuitry on the board for any issues.
- Use a logic analyzer: A logic analyzer can help you diagnose issues with digital circuits. It can show you the signals on various pins and help you identify issues with timing, signal levels, and more.
- Use an oscilloscope: An oscilloscope can help you diagnose issues with analog circuits. It can show you the waveform of a signal and help you identify issues with amplitude, frequency, and more.
By following these tips, you can troubleshoot and repair PCBs at home with confidence. Remember to take your time and be methodical in your approach to diagnosing and fixing issues.