
LED Tube Light PCB Assembly: A Comprehensive Guide
LED tube lights have become increasingly popular due to their energy efficiency, long lifespan, and low maintenance costs. The printed circuit board (PCB) assembly is an essential component of LED tube lights, as it provides the necessary electrical connections between the LED chips and the driver circuit. The assembly process involves mounting the LEDs onto the PCB, soldering the components, and testing the circuit to ensure that it functions properly.

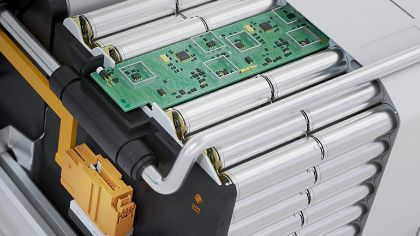
LED tube light PCB assembly requires a high degree of precision and attention to detail. The PCB must be designed to accommodate the specific requirements of the LED chips, such as their voltage and current ratings, as well as the driver circuit. The assembly process involves placing the LED chips onto the PCB, aligning them with the solder pads, and soldering them in place. The driver circuit is then connected to the PCB using wires or connectors, and the entire assembly is tested to ensure that it functions correctly.
Overview of LED Tube Light PCB Assembly

LED tube lights have become increasingly popular due to their energy efficiency, long lifespan, and low maintenance costs. The printed circuit board (PCB) assembly is a crucial step in the manufacturing process of LED tube lights. This section will provide an overview of LED tube light PCB assembly.
The assembly process begins with the preparation of the PCB, which involves cleaning and applying a layer of solder paste onto the copper pads. The components, including the LED chips, resistors, capacitors, and diodes, are then placed onto the PCB using a pick-and-place machine. The PCB is then passed through a reflow oven, where the solder paste is melted, and the components are soldered onto the PCB.
Quality control is an important aspect of LED tube light PCB assembly. Each PCB is inspected for defects, such as misaligned components, solder bridges, and missing or damaged components. Automated optical inspection (AOI) and X-ray inspection are commonly used to ensure the quality of the PCB assembly.
In conclusion, LED tube light PCB assembly is a crucial step in the manufacturing process of LED tube lights. The assembly process involves the preparation of the PCB, placement of components, soldering, and quality control. The use of advanced technologies, such as pick-and-place machines, reflow ovens, AOI, and X-ray inspection, ensures the quality and reliability of the LED tube lights.
Components and Materials
LED Chips
LED chips are the heart of any LED tube light. They are responsible for producing light and are available in different colors, sizes, and shapes. The most common LED chips used in tube lights are SMD 2835 and SMD 5630. SMD 2835 is a low-power LED chip that is suitable for general lighting applications, whereas SMD 5630 is a high-power LED chip that is ideal for high-brightness applications.
PCB Materials
The PCB (Printed Circuit Board) is the backbone of any LED tube light. It provides mechanical support to the LED chips and other components and ensures proper electrical connectivity. The most common PCB materials used in LED tube lights are FR-4 and aluminum. FR-4 is a flame-retardant material that is widely used in the electronics industry. Aluminum PCBs, on the other hand, offer better thermal management and are suitable for high-power LED tube lights.
Solder Paste and Components
Solder paste is a crucial component in the assembly of LED tube lights. It is used to join the LED chips and other components to the PCB. The most common type of solder paste used in LED tube light assembly is lead-free solder paste. It is environmentally friendly and offers good electrical conductivity.
Apart from the LED chips and PCB materials, other components used in LED tube light assembly include resistors, capacitors, diodes, and transformers. These components are responsible for regulating the voltage and current and ensure proper functioning of the LED tube light.
In summary, LED tube light assembly requires high-quality components and materials to ensure optimal performance and longevity. LED chips, PCB materials, solder paste, and other components must be carefully chosen to ensure proper electrical connectivity and thermal management.
PCB Design and Layout
Circuit Design
The circuit design of LED tube light PCB assembly is a crucial aspect that determines the overall performance of the lighting system. The design must ensure that the power supply and the LED driver are adequately sized to deliver the required power to the LEDs. The LED driver must be designed to provide a constant current to the LEDs to ensure consistent and efficient performance.
To achieve this, the designer must carefully select the components and create a circuit layout that minimizes the distance between the power supply and the LEDs. This ensures that there is minimal voltage drop and that the LEDs receive the required voltage and current.
Thermal Management
Thermal management is another critical aspect of LED tube light PCB assembly. The LED driver and the LEDs generate heat, and if not managed correctly, can reduce the lifespan of the LEDs and affect their performance.
To address this, the designer must incorporate a heat sink into the design to dissipate the heat generated by the LEDs and the driver. The heat sink must be selected based on the size of the PCB and the power rating of the LEDs. The designer must also ensure that there is adequate spacing between the LEDs to allow for proper airflow and heat dissipation.
In addition, the designer must select a PCB material with good thermal conductivity to ensure that the heat is efficiently transferred from the LEDs to the heat sink. By carefully designing the circuit and managing the thermal aspects, the LED tube light PCB assembly can deliver consistent and efficient performance while ensuring a long lifespan for the LEDs.
Assembly Process
Soldering Techniques
Soldering is a crucial process in LED tube light PCB assembly. It involves joining two or more metal parts together using a heated soldering iron and a special type of metal alloy called solder. The soldering process requires skilled technicians who are trained to handle the delicate PCBs and components.
There are two main types of soldering techniques used in LED tube light PCB assembly: manual and automated. Manual soldering is a time-consuming process that requires a lot of skill and precision. Automated soldering, on the other hand, is faster and more efficient, but requires expensive machinery and specialized training.
Automated Assembly
Automated assembly is becoming increasingly popular in LED tube light PCB assembly. It involves the use of machines and robots to assemble the PCBs and components. This process is faster and more accurate than manual assembly, and it also reduces the risk of human error.
Automated assembly machines are programmed to perform specific tasks such as placing components, soldering, and testing. They can also detect defects and errors in the assembly process, which helps to improve the overall quality of the finished product.
Quality Control
Quality control is an essential part of LED tube light PCB assembly. It involves checking the PCBs and components at every stage of the assembly process to ensure that they meet the required standards.
Quality control technicians use a variety of tools and techniques to test the PCBs and components, including visual inspection, electrical testing, and functional testing. They also use statistical process control (SPC) to monitor the assembly process and identify any trends or patterns that may indicate a problem.
In conclusion, LED tube light PCB assembly requires skilled technicians, specialized machinery, and strict quality control measures to ensure that the finished product meets the required standards. By using automated assembly and quality control techniques, manufacturers can produce high-quality LED tube lights that are reliable and efficient.
Testing and Validation
Electrical Testing
After the LED tube light PCB assembly is completed, it undergoes a series of electrical tests to ensure it meets the required specifications. The electrical testing includes checking for short circuits, open circuits, and continuity. The testing is done using specialized equipment that can detect any faults in the assembly.
During the electrical testing, the voltage and current are measured to ensure they are within the specified range. The testing also includes checking the power factor, which is the ratio of real power to apparent power. The power factor should be as close to 1 as possible to ensure efficient use of power.
Lifetime Testing
Lifetime testing is an important part of the LED tube light PCB assembly process. The testing is done to determine the expected lifespan of the LED tube light. The lifetime testing is done by subjecting the LED tube light to different environmental conditions such as temperature, humidity, and vibration.
The LED tube light is tested under different conditions to simulate real-world usage. The testing is done for a specific period of time, and the results are recorded. The data obtained from the lifetime testing is used to determine the expected lifespan of the LED tube light.
In conclusion, electrical and lifetime testing are critical steps in the LED tube light PCB assembly process. These tests ensure that the LED tube light meets the required specifications and will perform reliably over its expected lifespan.
Packaging and Shipping
After the LED tube light PCB assembly process is complete, the next step is to package and ship the finished products to customers. Proper packaging and shipping are crucial to ensure that the products arrive at their destination in good condition.
To protect the PCBs during transportation, they are usually packed in anti-static bags or foam-lined boxes. This helps to prevent damage from electrostatic discharge and physical impact. The PCBs are also secured with tape or other fasteners to prevent them from moving around inside the packaging.
In addition to protecting the PCBs, it is important to label the packaging clearly. This includes information such as the product name, quantity, and any special handling instructions. This helps to ensure that the products are handled correctly during shipping and that they arrive at the correct destination.
Once the PCBs are packaged, they are ready to be shipped to customers. Shipping methods may vary depending on the customer’s location and shipping preferences. Some common shipping methods include air freight, sea freight, and ground transportation. The choice of shipping method will depend on factors such as cost, delivery time, and the size and weight of the products.
Overall, proper packaging and shipping are essential to ensure that LED tube light PCBs arrive at their destination in good condition. By taking the necessary precautions and using appropriate packaging materials, manufacturers can help to ensure that their products reach customers safely and efficiently.