
PCB Assembly Stencil: The Key to Precise and Efficient Soldering
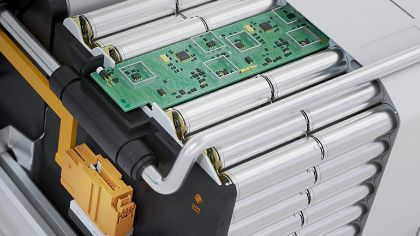
PCB assembly stencils are an essential tool in the manufacturing process of printed circuit boards. They are used to apply solder paste onto the board, which is then used to attach the electronic components. The stencil is essentially a thin sheet of metal or plastic with openings that match the placement of the components on the board.

The use of PCB assembly stencils has become increasingly popular due to the rise of surface mount technology (SMT). SMT components are smaller and lighter than through-hole components, making them more efficient and cost-effective. However, the small size of these components makes them difficult to place accurately without the use of a stencil. The stencil ensures that the solder paste is applied precisely where it is needed, reducing the risk of errors and defects in the final product.
Basics of PCB Assembly Stencil

Stencil Functionality
A PCB assembly stencil is a thin sheet of material with cutouts or openings that are designed to match the shape and size of the components on a printed circuit board (PCB). The stencil is placed over the PCB and solder paste is applied through the openings onto the board. The solder paste then holds the components in place during the reflow process.
The primary function of a stencil is to ensure accurate and consistent placement of the solder paste. This is critical for the proper functioning of the PCB and the components on it. The stencil also helps to reduce the amount of solder paste required, which can save costs and reduce the risk of defects.
Types of Stencils
There are two main types of stencils used in PCB assembly: framed stencils and frameless stencils.
Framed stencils are made with a metal frame that surrounds the stencil and holds it in place. These stencils are typically more durable and can be reused multiple times. They are also easier to handle and align on the PCB.
Frameless stencils are made without a frame and are typically less expensive. They are often used for small volume production runs or prototypes. However, frameless stencils can be more difficult to handle and align on the PCB.
Stencil Design Considerations
When designing a stencil, there are several factors to consider. The size and shape of the openings must match the components on the PCB. The thickness of the stencil must also be carefully chosen to ensure that the correct amount of solder paste is applied.
Other factors to consider include the type of solder paste being used, the size and pitch of the components, and the printing process being used. The stencil must also be properly aligned on the PCB to ensure accurate placement of the solder paste.
Overall, the design of the stencil is critical to the success of the PCB assembly process. A well-designed stencil can help to ensure accurate and consistent placement of the solder paste, which is essential for the proper functioning of the PCB and its components.
Stencil Fabrication Process
Material Selection
The first step in stencil fabrication is selecting the material. The most commonly used material for stencils is stainless steel due to its durability and resistance to corrosion. However, other materials such as nickel, brass, and polyester can also be used depending on the specific application.
The thickness of the material is also an important consideration. Thicker materials are more durable but can be more difficult to handle and cut. Thinner materials are easier to handle but may not be as durable.
Cutting Techniques
Once the material has been selected, it must be cut to the desired shape. There are several cutting techniques that can be used, including laser cutting, chemical etching, and electroforming.
Laser cutting is a precise and efficient method that uses a laser to cut the material. Chemical etching involves using a chemical solution to dissolve the material and create the desired shape. Electroforming uses an electric current to deposit metal onto a mold, creating the desired shape.
Each cutting technique has its own advantages and disadvantages, and the choice of technique will depend on factors such as the material being used, the desired shape, and the budget.
Overall, the stencil fabrication process requires careful consideration of material selection and cutting techniques to ensure a high-quality stencil that meets the requirements of the specific application.
Solder Paste Application
When it comes to PCB assembly, solder paste application is a crucial step that determines the quality of the final product. The solder paste is applied to the board using a stencil, which ensures that the paste is applied only to the designated areas.
Printing Process
The printing process involves placing the stencil over the board and applying the solder paste using a squeegee. The squeegee forces the paste through the openings in the stencil and onto the board. The thickness of the paste layer is determined by the size of the openings in the stencil and the pressure applied by the squeegee.
Alignment and Precision
Alignment and precision are critical factors in ensuring that the solder paste is applied accurately. The stencil must be aligned precisely with the board to ensure that the paste is applied to the correct areas. Any misalignment can result in defects such as bridging or insufficient solder.
To ensure the highest level of precision, advanced stencils can be used that incorporate fiducial marks. These marks are used to align the stencil with the board and ensure that the paste is applied accurately.
Overall, the solder paste application process plays a critical role in the quality of the final PCB assembly. By using a high-quality stencil and ensuring precise alignment and application, manufacturers can produce high-quality products that meet the needs of their customers.
Inspection and Quality Control
Manual Inspection
After the solder paste has been applied to the PCB, a manual inspection is conducted to check for any defects or inconsistencies. This process involves visually inspecting the paste to ensure that it has been applied evenly and accurately to the PCB. The inspector checks for any smearing, bridging, or insufficient paste deposits that could cause issues during the assembly process.
To aid in the inspection process, a magnifying glass or microscope is used to view the PCB and ensure that the paste is applied correctly. Any defects found during the manual inspection are noted and corrected before the PCB moves on to the next step in the assembly process.
Automated Optical Inspection
Automated Optical Inspection (AOI) is a process that uses advanced technology to inspect the PCB for defects and inconsistencies. This process involves taking high-resolution images of the PCB and analyzing them for any abnormalities.
AOI systems use algorithms to detect missing components, incorrect component placement, and defects in the soldering process. This process is much faster than manual inspection and can detect defects that may be missed during a manual inspection.
AOI systems can also be programmed to check for specific defects or inconsistencies, such as solder bridges or insufficient paste deposits. Any defects found during the AOI process are flagged for correction before the PCB moves on to the next step in the assembly process.
Overall, manual inspection and AOI are both important steps in the PCB assembly process to ensure that the final product is of high quality and free from defects.
Maintenance and Storage
Cleaning Procedures
To ensure the longevity and optimal performance of PCB assembly stencils, regular cleaning is necessary. The frequency of cleaning depends on the usage and the type of solder paste used. Typically, cleaning after every 500 to 1000 prints is recommended.
The cleaning process involves removing the excess solder paste from the stencil surface. This can be done using a dry wipe or a lint-free cloth. For more stubborn residues, a cleaning agent such as isopropyl alcohol or a specialized stencil cleaner can be used. It is important to avoid using abrasive materials or harsh chemicals that can damage the stencil.
Proper Storage Practices
Proper storage of PCB assembly stencils is crucial in maintaining their quality and performance. Stencils should be stored in a dry and cool environment, away from direct sunlight and moisture. A temperature range of 10-30°C and a humidity level of 40-60% are recommended.
It is important to store stencils flat and not rolled or folded to prevent any damage or deformation. Stencils should also be kept in their original packaging or a protective sleeve to prevent any scratches or dust accumulation.
When not in use, stencils should be stored in a dedicated storage area or cabinet. It is recommended to label the stencils with their respective part numbers or project names to ensure easy identification and retrieval.
By following these cleaning and storage procedures, PCB assembly stencils can maintain their quality and performance for a longer period, resulting in better yields and cost savings for the manufacturer.